Game Boy Interface
The Game Boy Interface (GBi) is homebrew software that’s a replacement for the GameCube / Game Boy Player boot disc. It’s written by Extrems, who’s also part of the Swiss team. Original hardware is still required (GameCube and Game Boy Player), however I find it to be a vast improvement over the original, as it supports 240p, low-lag as well as many other options. This page explains how to run the software, as well as more details about what it does.
GBI Versions:
The Game Boy Interface has a few different versions available, each with their own specific use. I’ll list basic info here, but for detailed info and an updated spec sheet, please visit the main GBI thread: https://www.gc-forever.com/wiki/index.php?title=Game_Boy_Interface
Main version labeled GBi
The main version offers a ton of features, including an on-screen display, screenshot saving, ROM dumping and some awesome zoom modes. If you launch this version with the Swiss software, you can customize the resolution and aspect ratio as well. While it offers the same latency as the original GBP Disc everything else about it is better and the games look great! There are too many options to list here, so for details, please visit the main GBI page linked above.
high-fidelity (hf) edition:
This version has low latency, but not a full-featured GUI. You can still configure it with custom “cll” files and it supports many video outputs. This is my go-to version of the software when possible! A note: If you have issues with custom modes, try it without the cli file present to make sure you’re not booting an incompatible mode.
speedrunning (sr) edition
This version offers features geared speedrunners; Certain configurations will allow the lowest latency possible and can run as accurate as an original GBA.
How to run GBI / Running in 240p:
I’ll list the basic ways to launch the GBi with instructional videos for each. Also, the hf and sr versions should launch in 240p mode automatically, however I recommend using the Swiss software to launch all of them. Swiss is an excellent tool to have anyway, so if you don’t already know how to use it, this will show you how:
Start by downloading both GBI and Swiss, then extracting the archives to their own directory. Here’s links with important notes on each:
GBI: http://files.extremscorner.org/gamecube/apps/gbi/latest
When using these files, make sure to copy the entire contents of the archive (including subfolder) to whatever media you’ll be playing from, or Swiss won’t detect the file properly and other features won’t be available.
GBI Extras: http://files.extremscorner.org/gamecube/apps/gbi/latest-extra
These contain borders and other enhancements. Add the contents of this archive to the same folder as above.
Swiss (Under ‘current nightly build’): https://github.com/emukidid/swiss-gc/releases
If you’re simply looking to burn a Swiss disc, just burn the corresponding file in the Swiss\ISO folder (make sure the region matches your GC’s). For most other uses, you’ll want to use the dol file located in Swiss\DOL (not the compressed one).
Playing from an SD card:
If you’re using an Action Reply boot disc, or have another method of launching software from an SD card, simply copy the GBI software to it and run from there – PLEASE NOTE that SDHC cards often don’t work, regardless of format; You’ll most likely need 2GB or less. Make sure you copy the entire contents of the GBI archive, or some features will be missing. As an FYI, I’ve used a random Action Replay disc (that wasn’t part of an SD kit) with a generic SD adapter and it worked just as well as the actual kit.
GameCube Action Replay (buy to match your region; PAL or NTSC): https://ebay.to/2FNh1LV
SD Card Reader (use 2GB or smaller): https://ebay.to/2Sgc2VG
Playing from a bootable DVDr:
If your GameCube is already modded to play burned DVDr’s, then you can simply download or create a bootable ISO. The best way to do it, would be to create a Swiss boot disc with the GBi software on it as well. lease see instructions below that show you how to create your own bootable Swiss / GBI Disc and only use these for reference. As an FYI, I use ImgBurn for my discs, but lots of other software will work.
Make your own bootable Swiss / GBI disc:
It’s not too hard to make your own disc, you’ll just need a bit of patience and a few tools.
– First, make sure you’ve downloaded Swiss and GBI from the links at the top of this page.
– Next, download the GC Bootable Disc Maker: http://wiki.gbatemp.net/wiki/GC_Bootable_Disc_GUI
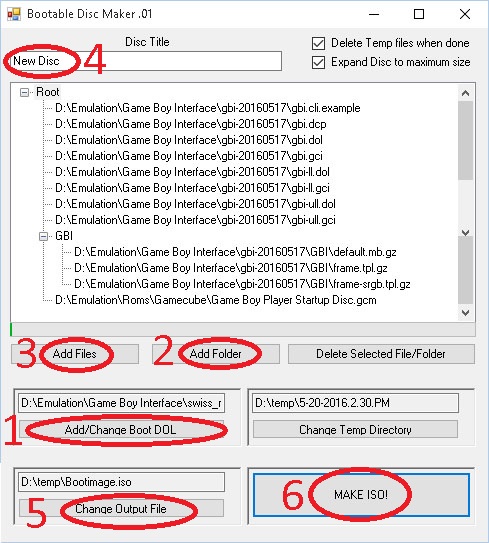
– Run the Disc maker and carefully perform the following steps:
1) Hit “Add/Change Boot DOL”, then navigate to the Swiss\DOL directory you extracted earlier. Select the dol file (not the compressed one).
2) Hit “Add Folder” and create a folder called “GBI”.
3) Make sure “Root” is highlighted (click on it if it isn’t), then hit “Add Files”. Select all of the files from the GBI software you extracted. You can add any other software as well; I also added the GBP disc.
Then highlight (click on) the GBI folder you just created in the last step. Hit “Add Files” and add the contents of the GBI subdirectory. If you didn’t download any extras, there might not be anything to add.
4) Label the disc. You can put anything.
5) Select the folder the file will output to. The default is the C:\, however I do not recommend trying this: Most Windows 10 installs block any files from being saved to the root of the C:\ drive. I suggest just saving it to the desktop.
6) Hit “MAKE ISO!” and prepare to wait a LONG time! I have a pretty fast computer and it took almost twenty minutes to create.
– After the ISO is created, you’ll get a completed message:

– Use your favorite burning software to burn it to a disc. I use ImgBurn and always set it to the slowest burning speed.
– That’s it! You should now have a disc that boots to Swiss, but also contains the GBI software.
Examples:
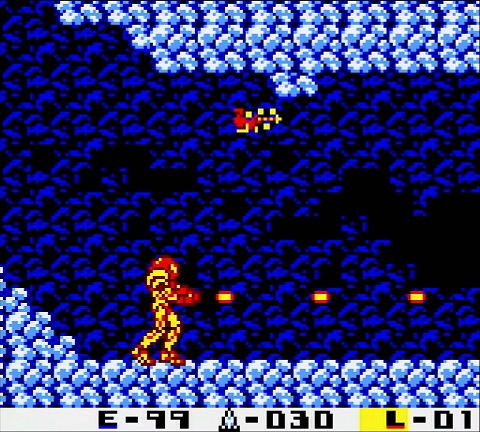
I’ll update this section soon with pictures and videos of the GBi in action. For now, here’s a few quick screenshots FireBrandX sent me running through his profiles on the XRGB Mini upscaler.

Conclusion:
Overall, this software is amazing and absolutely my favorite way to play GB/GBC/GBA games on an RGB monitor. I hope this page made all the boot methods clear enough and that everyone who wants to play portable games on a big screen gives it a try!
If you’d like, check out the GBA Cartridges on a Display page for all other options to play Nintendo portable games on a big display. If you’re done, please click here to go back to the main GameCube Page. If you’d like info on mods for other systems, head to the Getting RGB From Each System page or check out the main page for more retro-awesomeness.